Growing Tips
You may have been growing iris for years, but so have I. Read on! Chances are, you might discover something that you don’t already know.
BEARDED IRIS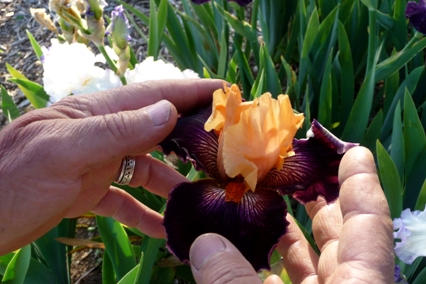
Bearded Iris are the second easiest plants to grow in our area. Only daffodils are easier. Iris originated in places that have hot, dry, rainless summers and cool wet winters. So, the closer that you can approximate these conditions, the better off you will be.
WHEN TO PLANT
Iris are extremely forgiving and can actually be planted any day of the year. However, early September is planting prime-time. Why? Three big reasons come to mind. The rhizomes will be semi-dormant and therefore suffer less transplanting shock. The heat of summer will soon end. And most importantly, the rhizomes will get a chance to get somewhat established before the really cold weather stops their growth.
WHERE TO PLANT
IT’S BEST TO PLANT IRIS AT LEAST 3 FEET AWAY FROM WHERE THEY HAVE RECENTLY BEEN GROWN! Virgin soil is very best. Why do this? After years of observation, I now operate on a theory that, in addition to depleting the soil, each iris produces a self-protection TOXIN that accumulates in the soil over time. Therefore, re-planting in “used soil” will often result in less than optimal performance. Some have named this IRIS DECLINE. If you absolutely must re-plant in the same location, here’s my trick. Cut the bottom out of a 5-gallon or larger, black nursery pot. Dig a hole and sink the pot in the ground to the rim. Fill the pot with good, ordinary garden soil that was sourced from a location that was iris free. Plant your rhizomes in the pot. This simple method prevents the new roots from coming in contact with old, contaminated and depleted soil.
Iris like full sun but can normally handle as little as a half day of sun. If you’re short of sunny locations, you can try planting them on the south side of deciduous trees. Most deciduous trees usually have no leaves for much of the fall, winter and early spring which corresponds to the time when iris are more active. So, the iris will use this lengthy, leaf-free, shade-free time to bloom and store energy.
Iris hate to have their feet wet. So, don’t plant them where water puddles or stands for extended periods of time. If this is a problem, plant them in well-drained soil, on a slope, in a container or on a raised bed. If you have irrigated flower beds, plant you roses and other water loving plants in the wet spots and your iris in the driest spots. Compared to almost any other garden plant, it’s amazing how little water they actually need. Treat them more like a cactus than a houseplant.
PLANTING DEPTH
Plant the rhizome just barely under the soil surface. If planted too deeply, they’re likely not to bloom. But even then, after a couple of years the plants will automatically reposition themselves nearer the surface and begin blooming all on their own!
FERTILIZATION
Iris will “do ok” with little or no special care. However, irises are heavy feeders. If you want to have superior plants and bloom, you must continually build up the organic content of your soil and fertilize. The single biggest gardening mistake you can make is not knowing and then adjusting the PH of your soil. If the PH is wrong, all the fertilizer in the world will not do any good. Iris, along with most other plants, prefer a neutral PH soil. However, many Western states have alkaline soil. Therefore, I use Turfgro brand fertilizer, available at Horizon landscape & irrigation stores. 20# or 50# bags. In Merced, corner of Hwy. 59 and Olive. In Fresno, 349 W. Bedford Avenue. This 15-15-15 fertilizer also contains 5% Sulfur, which corrects an alkaline condition. If you can’t find this product, most fertilizers that are identified as azalea, camellia & rhododendron food, will usually contain our secret ingredient, sulfur.
Most people are usually too stingy with fertilizer. As a general rule, I tell people to sprinkle it on the ground until it roughly equals the frequency of freckles on a person. Use this amount once a year. I fertilize in the fall or mid-winter and let the normal winter rains wash it in. Do not use high-nitrogen fertilizers or fresh manure. The ONLY THING that I put ON iris is the above commercial fertilizer. However compost and mulch can be put AROUND iris is great abundance providing you give them a few inches of “breathing room” between plant and mulch. Irises are sunbathers. They need the hot rays of the sun beating down on the center of the plant to be happy and healthy. Therefore, you don’t want mulch, weeds, groundcover, or anything else to block the natural sunlight beaming down on the plants.
WATERING
I seldom water the iris in my mountainous, California display garden. How is this possible? The primary reason is that I have the natural climate that iris like. Hot dry summers and cold, wet winters. Additionally, I use a very heavy layer of wood chip mulch on my pathways and AROUND (but never ON) the plants to conserve moisture, temper the effect of the summer sun, re-build the soil and to stop weeds. When expanding to “new ground”, I may use an 8 inches layer of wood chips to smother the residual weed seed for multiple years. Whether your smart or just lazy, it’s easier to mulch than pull weeds.
Irises don’t need to be kept green and growing all summer. Unlike most garden plants, iris are perfectly happy with going semi-dormant for a couple of months during the heat of summer. In the wild, this is a natural part of their normal life cycle. I’ve found that they’re not just drought tolerant, their actually drought happy! So, why fight their normal life cycle by pouring on the water? Give yourself and the iris a break. Instead of summer watering, why not use the water for ice tea?
Like everyone else, I experience years with abnormal rainfall patterns. If early-spring is dry, I’ll water to bring on the bloom. If its dry in late-spring, I’ll deeply water around mid-May to help carry the plants into their normal summer dormancy. And if the fall rains are slow to return, I’ll water deeply in mid-October to re-start fall growth.
NAMETAGS
One of the easiest and least costly nametag solutions are to use a piece of discarded mini-blind. Cut them into 9" lengths and write on them with an ordinary lead pencil or a China Marker. Don’t us permanent, Sharpie markers. Instead of fading slowly, they disappear all at once and your plant name is subject to being lost.
REBOOMERS?
Some varieties of iris have a strong tendency to bloom in the spring and then put on another show in Summer or Fall. They are called rebloomers and they usually require additional care to stimulate that second bloom. The crucial difference is that you must water and fertilize your rebloomers throughout the entire summer or any other protracted dry-spell. To make this job easier and more convenient, I group my rebloomers into one bed.
TRANSPLANTING AND DIVISION
Iris in clumps will perform their best at 2,3 or 4 years of age. However, after a several seasons of growing in the same spot, you will notice a decrease in rhizome size, plant vigor and bloom quality. If this is the case, you should dig, divide, and transplant your iris to a NEW LOCATION (even if it is just a couple of feet away). Remember “Iris Decline” mentioned above?
TRIMMING
Spent bloom stalks can always be removed. Also, dead or dying leaves can also be removed for cosmetic purposes or to get more sun exposure on the rhizomes. However, except during transplanting, YOU SHOULD NEVER CUT BACK ANY GREEN PLANT MATERIAL. Why? Photosynthesis is continually taking place in ALL the green parts of the plant. If you remove some of the “green parts”, you’re reducing the plants’ food supply and are therefore hurting next year's bloom.
IN CONTAINERS
Iris will grow quite well in a 5-gallon nursery pot or other containers. However, they will need increased fertilizing, frequent watering and yearly repotting to keep them happy. I put these “display” containers around the yard during bloom season and just “park” them under a sprinkler in the summer garden when they are finished. Drip irrigation is also very effective watering solution for container iris.
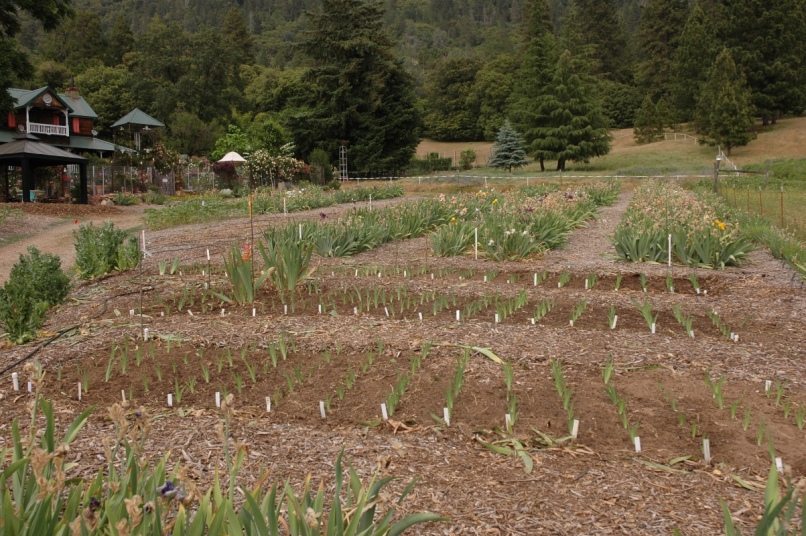
REBUILDING YOUR SOIL/ BED ROTATION
I use the same width for my Beds and Pathways. Five and one-half feet works for me. Rather than high-maintenance lawns, the pathways are deeply covered with a permanent mulch (mostly wood chips). Over time, the mulch breaks down and rebuilds the soil. After 3 years, I swap the pathway/beds. The irises are moved to the pathway area and the old pathways become my new beds. Simple!
DEER
Deer seldom bother iris. In all my experience, I’ve only known of two occasions where deer ate the iris foliage to the ground in late summer (when the plants are semi-dormant and otherwise don't care). In each case the iris grew back with the onset of fall rains and were virtually unaffected at the next spring bloom.
GOPHERS
Gophers eat iris. After 35 years of fighting gophers, I can tell you that there are no easy solutions. If you have a new plant or small clump, you may lose everything. If you have a large clump, it’s unusual for them to eat the whole thing. In this instance, they might even be of help because you won’t have to dig, thin and transplant as often. In addition to planting in containers, here’s one idea. Plant your new rhizomes in one of the wire gopher cages available at hardware and nursery outlets. Once the plant gets some size, take it out of the basket and plant it out. You can then re-use the basket for a new iris or for one that has been eaten down to the danger level.